This article uses a simple development example of the exchange withdrawal function, including the preparation of the development environment and the deployment of BFMeta, so that developers can easily master how to develop their own DApp on the BFMeta network.The development example in this article uses TypeScript for development, in order to help developers get started quickly, some necessary tools need to be prepared before development.Install ypescript npm install -g typescript
View Typescript version tsc -v
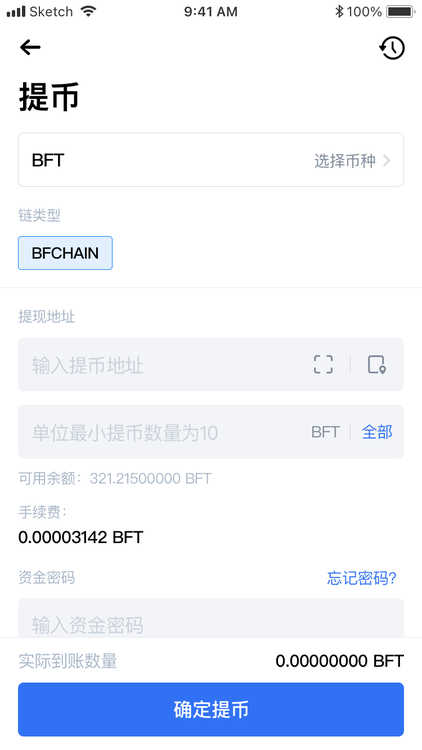
Developers can download the installation program of the node from the BFChain official website (https://developer.bfmeta.org), and start the local node after the installation.In mainstream exchanges, it is a common feature for users to recharge and withdraw cash. It includes the following features:
The functions are shown in the figure:

import { bfmetaSDK } from "../bfmetaSDKInit";
export class BFMetaUtil {
    public bfmetaSDK: BFMetaSDK = bfmetaSDK;
    constructor() {
    /**
    *   Get the latest block of the local node
    */
    async getLastBlock() {
        return this.bfmetaSDK.api.basic.getLastBlock();
    }
    /**
    *   Obtain account balance
    *   @param:address:account address
    *   @param:assetType:asset type
    */
    async getAddressBalance(address: string, assetType?: string) {
        if (!assetType) assetType = "BFM";
        const accountAsset = await this.bfmetaSDK.api.basic.getAccountLastTransaction({
            address: address,
            assetType: assetType
        })
        if (accountAsset && accountAsset.success === true) {
            return this.getAssetBalance(address, accountAsset.result.transactionInBlock)
        } else {
            return "0";
        }
    }
    async getAssetBalance(address: string, tr) {
        const assetChange = tr.transactionAssetChanges;
        if (assetChange && assetChange.length > 0) {
            const isSender = address === tr.transaction.senderId;
            const isRecipient = address === tr.transaction.recipientId;
            let assetType = "";
            if(tr.transaction && tr.transaction.storageKey === "assetType" && tr.transaction.storageKey){
                assetType = tr.transaction.storageKey
            };
            for(const change of assetChange){
                if((isSender && change.accountType ===0) || (isRecipient && change.accountType === 1)){
                    if(!assetType){
                        return change.assetBalance;
                    }
                    if(assetType !== "BFM" && change.assetTypes === 0){
                        return change.assetBalance;
                    }
                }
            }
        }
        return "0"
    }
    get bfmetaSDK() {
        return this.bfmetaSDK;
    }
}In order to simplify the data model, in this example, we only use the two data models of Account and Transaction. Take MongoDB as an example.
import { Schema } from "mongoose"
const accountSchema = new Schema({
    accountId: { type: String, require: true },     // account ID
    address: { type: String, require: true },       // account address
    coin: { type: String, require: true },          // currency
    balance: { type: String, require: true }        // balance
});
export const account = mongoose.model("account", accountSchema)const transactionSchema = new Schema({
tranId: { type: String, require: true }, // transaction ID
amount: { type: Number, require: true }, // transaction amount
tranType: { type: String, require: true }, // transaction type
senderId: { type: String, require: true }, // sender ID
recipientId: { type: String, require: true }, // receiver ID
signature: { type: String, require: true } // transaction signature
});
export const transaction = mongoose.model("transaction", transactionSchema)// The project side itself needs to have certain business code to ensure the normal operation of its own project
// In this sdk, only the query interface for transaction generation and broadcast, block and transaction is provided.
// Project side needs to use these transactions to expand its own business usage scenarios.
// For example, the withdrawal function is equivalent to the equity transfer transaction on the chain.